Tuesday, June 25, 2013

Zoom Your Camera [Level II]


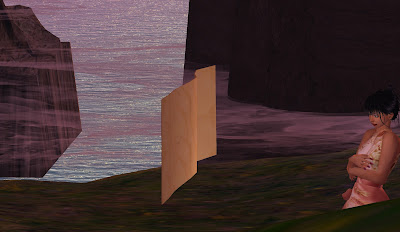
Above is a perfectly ordinary shot, taken at sunset on the Whimcentricity sim. In the foreground is a rusted-out boat by Wagnhorne Truss. Far away, in the background, is a lava flow on the volcano Pele.

Nice, shot, but wait. Let me zoom in my camera...


Click the images to zoom.

What the...!


Callie! Get out of my picture! Your eyes aren't rendering and it's creepy! Move along!

Click READ MORE to learn how to zoom your camera in and out.

Sunday, May 8, 2011

Mute and Derender [Level I]


If you mute a mime, is he still silent?
Photo from Albion Spiteller's FLICKR site

Written 4 May, 2011

Mute and Derender

Second Life is designed to make a level playing ground for every resident. A few people are able to game the system, but for the most part everyone has access to the same security and privacy safeguards. If you keep your password strictly to yourself and don't grant build and map-tracking features to others, people can't mess with your account or your in-world property.

But they can still harass and annoy you.

There are two tools which are absolutely invaluable when people annoy you: mute and derender.

Mute stops you from hearing their chat or getting their IMs, and silences their gestures and scripted object. Blessed silence!

Not all viewers have a derender feature, but Phoenix and Imprudence, at least, do. Derender stops you from seeing them something or someone. Combine it with mute and they're just... gone. It's as if they never existed.

Mute and derender persist until you reverse them. You can easily cancel them.

To mute someone, just right click on their avatar and mute them, or mute them from their profile. To unmute them, just go to your mute list, highlight their name, and choose unmute (or unmute them from their profile).

You an also mute someone by muting one of their objects.

To derender something or someone in Phoenix, just right click them and derender. To re-render them, go to the Phoenix Menu, choose Whitelist, and remove them from the list.

It's that easy.

Friday, March 18, 2011

I Found it in the Sock Drawer [Level I]


Written 18 March, 2011


I Found it in the Sock Drawer


Level I


I don't know about you, but I'm forever having entire folders vanish from their allotted location. One day Clothing > Chey's Things > Weapons > Edged Weapons > Swords > Scripted Swords > Japanese Swords > Katanas, and there it is, right where it's supposed to be. Two days later the entire Weapons folder is nowhere to be found.


OMG, it's gone! Gone forever!


No it's not. It's just in the sock drawer.


It's way easy to inadvertently move a folder into another folder. It happens all the time to me.


And so, I always look in my sock drawer. And there it is!


Actually, what I do is type the name of the missing folder, or, if I can't remember what I named it, something I know that's in the folder. When I locate the folder I drag it back into position and all is good.


I always check my trash before I empty it to be sure an important folder isn't in there. It's a good habit to get into.


Wednesday, March 9, 2011

How to Make a Flat Prim Even Flatter [Level II]

Written 6 March, 2011

How to Make a Flat Prim Even Flatter [Level II]

Or, How to Make a Flag

Here's a trick to make the thin edge of a flattened prim even thinner. It takes only a few seconds, and it's well worth the effort.

Flattening the prim works best for flexible objects like flags and clothing, but is handy for paper and the thin edges of three-prim plants.

Let's make a flag.

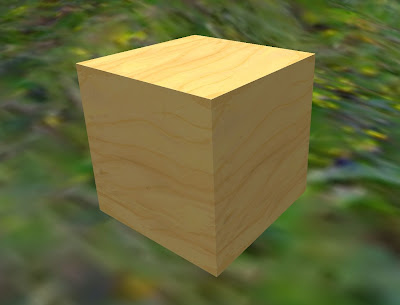
First, we rez a prim. Distinguished looking, isn't it?


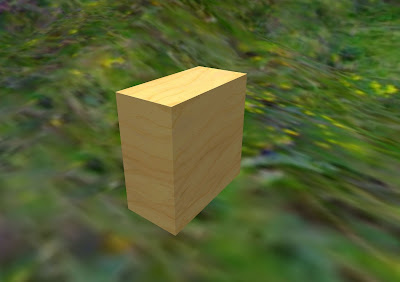
Now, in the Edit menu, select the Object Tab, and, in the Path Cut fields type 0.375 and 0.875. You'll see this halves the thickness of the prim along the Y dimension.

Here's the prim from the same camera angle.


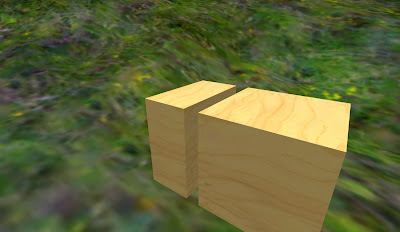
Here it is with an uncut prim beside it:


Now type .01 in the Y Size field of your prim. This sets the Y dimension to the smallest allowable, 0.01 meters.

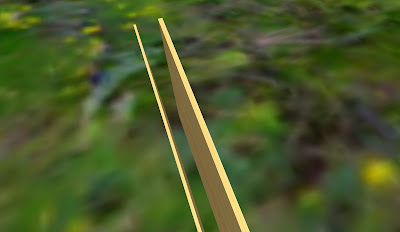
Here are the two prims, side-by-side. You can see the prim we cut is much thinner.


Here I've rotated the prim to 0,90,0 and checked the Flexible Path box under the Features tab. I set Softness to 3.0, Gravity, Drag, Tension, Force X and Force Z to 0, Softness to 3.0, Wind to 1.0, and Force X to 1, and the prim is waving merrily in the wind.


Now I add a flag texture Sweetie gave me long ago, rotate the texture by 270 degrees on the front of the flag, and...


But uh-oh, what's this?


Cutting the prim created two surfaces where there was once one, so the texture is displayed twice at 1:1 density on each face. And not only that, it's upside-down! And yes, that's a sea monster swimming by. Ya gotta love Second Life.

To fix, I turn on Select Texture and select both faces. Then I go to the Texture tab and select both faces. I set rotation to 90 and set Repeats Per Face to 1 (H) and 0.5 (V).

This puts the texture in the correct proportion, but things still don't look right.

Still in the Texture tab, set the vertical offset of the top face to 0.25 and the bottom face to 0.75.

Now the textures on the two faces are properly aligned, and our flag is complete.


Except for the pole, of course. But you know how to make a flagpole, don't you?

Tuesday, February 22, 2011

That Stumping Sound [Level III]

Reposted from Cheyenne's Blogpost of 7 February, 2011

That Stumping Sound (Level III)

Don't you hate that stumping sound when steps have too much rise? Don't you just love going Bump! on every step of a 100-meter-tall Aztec Pyramid, or bump bump bump as you walk up the stairs to your bedroom?

Well, guess what? You can turn that bumping sound down, replace it with a more pleasing sound, or turn the bumping sound off altogether!

There's a scripting command called llCollisionSound. It's easy to slip it into an existing script in your prims or into the default "Hello, Avatar!" script.

Here's a simple script that will turn the sound off. Just copy it and paste it into a new script in your noisy prim:

//-----

// Simple Collision Sound stopper by Cheyenne Palisades

default
{
state_entry()
{
llCollisionSound("", 0.1);
}

touch_start (integer x)
{
// Here you can make the script do stuff when it's touched, if that's your inclination
}
}

//-----

By experimenting, I discovered the script must remain in the prim in a running state to suppress the sound, so keep in mind it's not like a cleaner script that rids your prim of particles and looping sounds. If you take the script out, the bumping collision sound will come back to haunt you.

To substitute another sound, simply drop it in the prim with the script and type its name (or better, the sound's UUID) inside the quotation marks. Best to copy and paste the name, as any error will make for difficulties.

The number that follows the name sets the loudness; you can change it from 0.0 (silent) to 1.0 (maximum loudness).

The wiki notes that setting the volume to 0.0 will disable collision particles. I didn't even know there WERE collision particles! I left the volume set to 0.1, which is very low.

You can see the script in action at the Whimsy Sungate. When you step up onto the round viewing platform or from the platform down to the walkway there's no sound-- even though there's a rise of more than .5 meters.

No stump, stump, stump! Imagine that!

Most Postings

Written 23 February, 2011

More Postings

I've let this blog lie fallow for too long. I'll be posting regularly from now on-- at least one or two posts per month.


What's Wrong With This Picture?

Written 22 February, 2011

Gone is Gone!

I can't stand Linden Lab's 2.x viewers, and so consequently I use Phoenix. I like it. A lot.

One of Phoenix' more interesting features is derender. From the pie menu you can make any object or person disappear. It's handy when obnoxious people are present; you mute and derender them, and they're just... gone.

Until now crossing a region border or teleporting to a new sim would reset all derendered objects; they would e visible again.

But with Phoenix' latest release-- 1.5.2.908-- derender is permanent. Once an object is gone, it's gone, and you can't see it, even with Highlight Transparent enabled. Ever. Again.

I found this out the hard way today. When preparing the last post I derendered the floating platform at the game area.because it kept getting in the way when taking photographs. Later, I derendered some plants at the swamp area at Whimsy so I could grab and manipulate a 100% alpha fog emitter.

This evening I teleported to the game area to play mahjong. When I arrived the table was there, but the platform wasn't.

I relogged. Same problem.

I flew to the marsh to check on the derendered plants there. Didn't see them.

I searched the web and found a JIRA for permanent derender. From there I went to the release notes and discovered derender is now permanent; objects will show only if you remove them from the blacklist.

Great. Where's the blacklist?

Maybe the preference menu... Phoenix tab... Nope... Network & Folders... Nope.

Maybe it's on the hard drive... C:\... Program Files... Phoenix Viewer... app_settings...Nope... llplugin... Nope.

Surprisingly, I found no FAQ on the Phoenix website. I did find an in-world support group and joined. With nearly 9000 members it was not working properly, but repeately typing queries that weren't posted finally resulted in a reply. The blacklist was in the Phoenix menu at the top of the screen.

Duh.

Problem resolved.

It's Gone!
It's back!


Tuesday, July 20, 2010

Did You Know No. 1 (Level IV)


Written 20 July, 2010

Did You Know?

No. 1

(Level IV)

Welcome to the first Did You Know?

This feature will tell you something about the Second Life interface or the grid in general that you may or may not know.

Today, server version and the statistics window.

-----

A couple of weeks ago Linden Lab rolled out server 1.40. The grid has been running on 1.38.

1.40 introduced Havok7, a new physics engine. Havok7 replaces Havok4, which replaced an even earlier version of Havok two years ago.

Physics engines enable moving vehicles, animated animals (except the simple circling ones), and things like bullets and rolling rocks. Physics also allows avatars to move.

Physics put a large load on the server, and too many physical objects can kill performance. For this reason it's best to switch physical objects off when they're not in use. So a new physics engine makes for better sim performance and hence a better Second Life experience.

In the five minutes server 1.4 was operational earlier in the month, I noticed a significant performance improvement on both Whimsy and Whimsy Kaboom. Kaboom has a large load due to the many scripts at the robot sanitorium, and has been experiencing a bit of time dilation (not enough to make for a bad experience, but enough to worry me).

Well, with 1.40, which was rolled on about 9 AM Linden time today, Kaboom's time dilation is almost gone. The simulator is running a solid 44 frames per second.

And so now for the Did You Know?

Did you know you can determine the server version of any sim you're on? Simply drop down the Help menu at the top of the screen and choose About Second Life. You'll see not only the server version, but information about your viewer, your computer (operating system, processor, RAM, and, especially useful for Second Life, video card).

If the server version is 1.4, your sim is running Havok7. If it's V. 1.38, you're still on Havok4. Sims are rolling on today and the upgrade should be finished by tomorrow. If the Lindens don't roll back, we should be permanently on Havok7.

Here's a bonus:

Did you know SHIFT-CTRL-1 (CMD on the Mac) will open your statistics window? Here you can determine:

The statistics window provides performance data for the simulator-- your Second Life region. You can spot simulator lag, but viewer-side lag (caused primarily by particles, textures, and your video card's ability to fender millions of complex polygons), is far more often the culprit in the gender "lag" everyone talks about.

Frame Rate: (how many times Second Life updates per second; higher is better, as you can turn, walk, and fly more smoothly).

Internet Connectivity: A low Ping Time means fast response to your key presses and mouse movements; Packet Loss tells you the percentage of data lost in transmission. Bandwidth tells you how fast data are coming in and going out.

Simulator Performance: Time Dilation is how much molasses effect is going on; in other words, how much time is slowed by load on the sever. In other other words, how much lag you'll experience. SIM FPS is another measure of how much load is on the processor. 45 is optimal, 44 acceptable. Physics FPS is a measure of the amount of physics load on the simulator. 45 is optimal.

Avatar Data: Main Agents tell you how many avatars on on the sim. I have no idea what Child Agents measures. Oh, wait! The Wiki tells me it's the number of avies outside the sim who can see into it.

Objects and Scripts: How many objects are on the sim, how many scripts, and other script data I don't begin to comprehend.

Time: Tells in milliseconds how much processor time is used on objects, avatars, scripts, images, and physics. Total Frame Time should be less than 22.3 ms.

Saturday, July 25, 2009

Copying an Object [Level II]


What seems to be one prim...


... is actually four. These were made by turning on Copy Selected in the Create menu. Whichever face of the target prim you touch will align perfectly with the new prim. Be sure Center is turned on and Rotate is turned off. You can copy entire houses this way.

Copying An Object [Level II]


Second Life’s permissions system allows yourself to make infinite copies of any object you create—and many object you’ll buy or get for free will have copy permissions.

When you pull a copyable object from our inventory to the ground or (if it’s transferrable) give it to another person, it will remain in your inventory—so there’s no need to keep more than one copy in your inventory. If it’s a non-copy transferrable object, however, pulling it to the ground or giving it to someone will remove it to your inventory.

To make multiple copies of an object you can, of course, pull it multiple times from your inventory—but there are two easy ways to duplicate it. Both are simple.

Find some land where you can build and rez a prim or pull a copyable couch or airplane from your inventory. Then right click it and select Edit.

With the object selected you can, of course, use the red, blue, and green arrows to drag it about—but try holding the shift key and dragging the selected object 5 meters or so. Voila! You’ve moved the object, but yet it remains where it was. There are two now! You’ve made a copy!

We’ll leave it to you to figure out which is the original and which is the copy!

Now let’s try another method. Rez a simple prim cube.

Now right click it and select Create.

If you look carefully, you’ll see a box that reads Create Copy. Check that box. Be sure the box that reads Center Copy is also checked. Now touch the top or one side of your cube. Presto! A copy appears!

But not only has a second cube appeared, the side that touches is perfectly aligned with the first prim!

If you’re like me you’ll be jumping up and down with excitement about now. So THAT’S how builders are able to line up their prims! You’re smiling, thinking of how much easier it will now be to build a wall or a floor.

When you’ve finished playing be sure to uncheck Copy Selection; otherwise, when you try to rez a prim nothing will happen—unless you have a copyable object selected, in which case you may find a second copy of your house intermeshed with the original!

Sunday, December 21, 2008

Property Lines [Level II]


Property Lines [Level II]

Looking at buying or renting and want to know where the parcel starts and ends? Riding a motorcycle and wanting to avoid straying across the sim line?

Drop down the View menu and Select Property Lines. Turn them back off when you're finished.

If you own property, your lines will show in green. So, too, will your sim lines, if you own a simulator. Lines of property owned by others seem to show in red. But there are orange and blue lines, too. For the life of us, we can't figure out their significance?

Anyone?

Saturday, December 13, 2008

Workaround For Caspers [Levels I-IV]


Workaround for Caspers [Levels I-IV]

Caspers are avatars who appear to you as clouds of gas. I say TO YOU because they may not be caspered to me. It seems to be largely a client-side problem. This means the problem lies with the software on your computer and not the server at Linden Labs.

Usually caspers resolved into avatars, but not always. Occasionally a cloud of gas will hang around seemingly forever.

There's a workaround when this happens. Go the Edit menu at the top of the screen and select groups. Select a nonactive group and activate it. Then activate the group you just left.

More often than not, casper will be gone.

The above is called a workaround. When the Lindens seem unable or unwilling to fix a problem; some citizen somewhere usually discovers a way to resolve the problem.

Friday, December 12, 2008

A Discussion of Textures [Levels II-III]


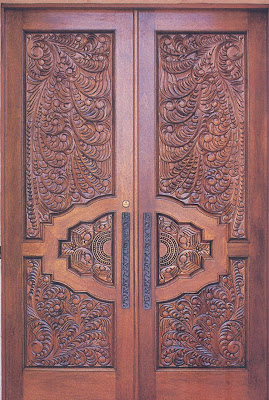
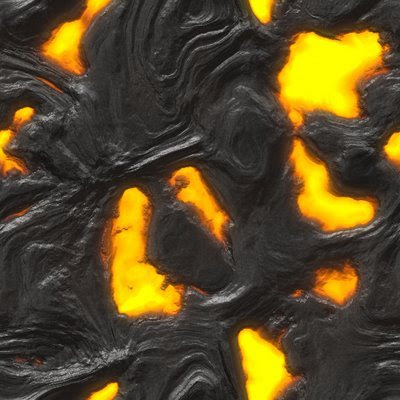
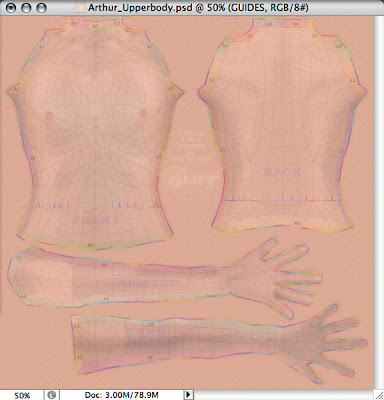
Photos: Two textures from the web, texture for upper template of avatar skin.

This article was writtenat the request of WhiteRaven Slade.

A Discussion of Textures [Levels II–III]

 Textures—we all know what they are. They’re images that either wrap around an object in world or appear as particles or make up your skin. Snapshots are really textures and textures are really shapshots. Take a look at that photo you put in your profile. Now think about it wrapping around a sphere. That’s what a texture does.

Without textures, all of Second Life would look like the default plywood. Not bad so far as plywood goes, but plywood can go only so far!

And so Second Life is rich with textures—cloth, wood, metal, terrain, stone, vegetation, building facades, signs, leopard spots, dragon scales and fairy wings—all of which were created by someone.

A few basic textures, like those you can find in the Library in your Inventory—were made by the Lindens. Most, however, were created by people like you and me.

Getting Textures

Second Life is full of free textures, some of which are quite good (and some of which are merely copies of the textures you already have in your Library). You can also find free and almost-free textures on www.XstreetSl.com and www.onrez.com.

There are any number of texture stores where you can buy sets of textures from everything from Egyptian tombs to argyle socks to Victorian doorways, but you can make your own textures as well.

For $10L, you can upload an image from your hard drive—a snapshot you took in Second Life, an image of a buddha you found on the web, or that nice tweed you scanned from last winter’s real life coat. You can paste the texture on a prim, and voila! You have a buddha, or a nice prim tweed skirt.

There’s more to it, of course. Images come in different sizes—and size is important. For that reason it’s handy to set the image size out of world. You can also make the image seamless out of world. Otherwise, you may wind up importing the same image three or four times before you’re satisfied with it. And those 10L charges can add up!

Hint: You can use Google to find free and inexpensive programs to set texture size and make your textures seamless. The free image manipulation program GIMP (www.gimp.org) has a filter which makes textures seamless. The great free image program ifRanview makes it easy to change the density of your images.

Hint: Many designer do preliminary uploading of textures on the beta grid, where importing is free. They import, tweak the original, and re-import until they’re satisfied. The images can’t be moved from beta to the main grid, but it reduces costs when you’re working with multiple textures, since you know the images you’ll be importing will be right the first time.

Texture Size

Images in Second Life come into world with dimensions in powers of two. The minimum size seems to be 32 and the maximum 1024—so the smallest possible texture size is 32 x 32, and the largest is 1024 x 1024. (I hear rumors of 2048 x 2048, but I’ve never seen one).

It’s important to understand that the textures one views take up memory space on video cards, and that the size of an image grows exponentially with a linear increase in size. A 1024x1024 texture takes up as much memory as four 512x512s, and as much memory as 16 256x256 or 64 128x128 or 256 64x64 or 1024 32x32 textures. Sims with small textures, and not too many of them, tend to load quickly. Areas with lots of large textures can take a long time to load. I’m sure you’ve been in shops where the signs were still gray after fifteen minutes!

To be a good citizen—and to improve your OWN Second Life experience—don’t bring textures in world any larger than you have to to keep them sharp. 1024x1024 and 1024x512 textures are necessarily only on the largest builds—huge prims. 256x256 and 512x256 sizes are sufficient for most things, and small objects will work at 32x64 or even 32x32. Particle scripts work best with small textures, which rez quickly. You’re probably familiar with particle scripts with big textures; they’re the ones responsible for that annoying gray fog when someone activates their poofer.

Hint: Whenever possible, reuse the same textures within a setting. Use one single granite texture, for instance, in place of four or six different rock textures.

Texturing a Prim

You can apply a texture to a prim by simply dragging it to the prim from inventory (or from the texture’s image, when it is open) to one side of a prim. Presto, there it is!

Hint: Hold Shift while dragging a texture to a prim, and it will be pasted on all sides of the object.

You can also apply textures by dragging a texture from inventory to the texture window on the Texture tab in edit. Or you can click the texture window and choose a texture from the mini inventory window that will pop up.

For textures to work correctly, you must have full permissions. Otherwise you must drag them to one side of a prim, and the prim will yell in protest. Ouch!

You can put different textures on different sides of a prim (torii have only one side, so of you can get two textures on one, let me know about it!). You can even put a texture on the hollowed-out inside of a prim.

Adjusting Textures

Once applied, you can stretch the x and y dimensions of a texture so only part of it is on a prim face or so it tiles multiple times across the prim face. You can rotate the texture, flip it along the x or y axes, and offset it vertically and horizontally. You can also make it partially or almost totally transparent. And you can do all this on the entire prim, or only on the faces you have selected.

Hint: To make an object completely transparent, you must use a pure alpha texture. You’ll find one in your library. After you’re made it alpha, you’ll then need to use Ctrl-Alt-T (Cmd-Alt-T on the Mac) to see it!

Hint: Here’s how to work on one side of a prim: click the Select Textures box on the General tab in Edit. Then shift click on the prim faces you want to work on. (You can click faces on other prims at the same time. Most handy!)

Hint: Tiling a texture (increasing the texture density to be more than one repeat), will increase its sharpness. Tiling works nicely for stones, fabrics, and wood.

Hint: If you increase texture density too much, your eye will dislike what it sees when there is a grain, as in wood. If you see the repeats and they annoy you, just back down the texture density a bit.

Organizing Your Textures

If you don’t organize the textures in your inventory, you’ll soon find yourself overwhelmed. You can make subfolders for wood, metal, and other categories, and sub-folders within those (Metal > Gold > Patterned).

Textures can soon clutter your inventory, however, and for this reason, most people use inventor organizers. Organizers can be HUD-based (meaning they paste to the inside of your screen) or rezzable (meaning you pull them out on the land). And these are divided into single-frame and multiple-frame organizers.

Single frame organizers are handy for storing textures with limited permissions. Multiple frame organizers can accept only textures will full permissions, but are handy because you can have as many as sixteen categories of objects. (Chey’s Building organizer, for instance, has categories for, among other things, bricks, doors, windows, interior walls, exterior walls, floors, ceiling, and tiles.)

Organizers will not only get thousands of textures out of your inventory; they will help you find the textures you want by letting you view sixteen or so of them at a time. If you do much texturing, an organizer will be worth the price. I use the multi-texture organizer sold by K.R. Engineering. It has worked flawlessly for two years. And it’s copyable, meaning I can have organizers for any number of categories. And I do! I even store my photos in an organizer!

You’ll soon see that textures can transform that plain plywood cube into almost anything you can imagine.

-----

Notice: Because limited-perm textures are pretty much unusable in Second Life, texture stores sell their wares with full permissions. They are licensed for YOUR USE ONLY. Please support content creators; don’t give their textures to others.

Saturday, September 6, 2008

Object Chat Trick! [Level IV]

Object Chat Trick! [Level IV]

Chey discovered a neat little trick when objects chat: they respond to /me pretty much the same way avatars do.

You know the /me trick.

type in Chat /me says hi

And others see "Cheyenne Palisades says hi" instead of "Cheyenne Palisades: says hi"

If you make an object say something, /me will make it say its name in the same way-- and if you make the object's name a blank, it will say only what follows /me.

So, you can have an object say something like "Do not enter!" without its name apeparing.

Try it! Make an object, make a script, and add /me after the opening quotes in the lines with llSay. 

Cool, huh?

-----

default
{
  state_entry()
  {
  llSay(0, "/me Hello, Avatar!");
  }

  touch_start(integer total_number)
  {
  llSay(0, "/me Touched.");
  }
}


Sunday, July 6, 2008

Remove Particles [Level III]

Remove Particles! [Level III)

In Second Life, smoke, mist, rain, fireworks, flame, and other things that aren't solid objects are comprised of particles-- think of them as sort of loose, flying textures.

Particles are produced by scripts that reside in prims.It's important sometimes to be able to turn them off.

If the script in your particle-emitting object doesn't give you a way to turn the particles off (for instance, by touching the prim or saying something like bling off or /bling off or /1 bling off, or if you've deleted the script and the object is still emitting particles, here's some code that will remove the residual particles-- for, you see, once a prim begins to emit particles, it will continue to emit them forever, or until the prim is delited-- unless the particles are turned off.

Please note-- some objects-- usually the ones you purchase, but sometimes freebies-- won't allow you to modify them. If that happens, you may be stuck with the particles. So be sure you can modify the prim's contents before you delete any scripts in your valuable items. If you can make a new script in the prim and if it stays there, you're golden.

So if you have a prim that is blinging, smoking, burning, or otherwise being obnoxious, and if you have permissions to modify it, follow these steps:

1. EDIT the prim.

2. If the particle-emitting script is in a prim that's part of a linked set, check the EDIT LINKED PARTS box in the GENERAL tab and touch the individual prim that is your target. Be sure only that prim is highlighted.

3. Delete the offending script if you're sure you won't need it, or open it by double-clicking and uncheck the RUNNING box at bottom left.

4. Click the CONTENT tab.

5. Choose NEW SCRIPT.

6. Double-click the script to open it.

7. Erase the code that is inside the script.

8. Paste in the code at the bottom of this blog entry. Be sure to select everything within the dashed lines (but not the dashed lines themselves).

9. SAVE the script (and be sure the RUNNING box at bottom left is checked).

10. Name the script something like "Particle Eraser" and drag it to your SCRIPTS folder in inventory. That way you'll have it for later.

As soon as the script runs, the prim will stop making particles. It may take a few seconds for them to dissipate. So...

11. Right click your Particle Eraser script and erase it from the prim. (so it won't consume system resources).

That's it!

-----

// particle erase script

default
{
  state_entry()
  {
   
  llParticleSystem( [] );
  }
}

-----

Wednesday, May 14, 2008

Getting Rid of Objects When Asset Servers are Down (Level II)

Sometimes Second Life's asset servers get into trouble. When that happens, you can't do much. Teleports are limited, you can't open notecards or scripts, you can't import textures or photographs,  you can't rez objects from inventory, and you can't delete objects on the ground. You zap them, and a minute later they're back, along with a "object returned to the simulator" message. Frustrating!

There's a way to get rid of objects, however. Chey discovered it last night. 

Just turn them temporary. After a minute or so they will disappear. Permanently.

To turn an object temporary, just edit it and select the Object tab. On the left side of the edit box, just below the horizontal row of tabs, check the box that reads Temporary. End of problem.

Be careful with this! If you turn your valued living room set temp, it will disappear permanently, with no warning. You won't find that couch and its cushions in your trash, either. It will just be gone.

It's good as a rule to set ONLY copyable objects to temp. But remember, when you just can't seem to get rid of a prim or linked set of prims, Temp will do the job.

Saturday, May 3, 2008

A Clean Palette: How to Prepare Objects for PhotoShop [Level IV]


A Clean Palette:

How to Prepare Objects for PhotoShop [Level IV]


One of the most time-consuming chores in photo manipulation, we are finding, is cutting a figure from its background. there are a number of ways to do it, but they are all a lot of work and all less than perfect.

Here's a way to prep your in-world builds so they will be easy to work with in PhotoShop or GIMP (the free image manipulation program we are learning to use).

Meet Mr. Tiki. Of course, if you have ever ridden our train, you're familiar with him, as our train goes right down his gullet!

In his natural environment, Mr. Tiki is surrounded by sand, water, sky, clouds, palms, and the occasional passing seagull. It's a lot of work to remote all that.

But Chey saved a lot of time by some work in world.

First, she raised him to 300 meters.

Then she used the Advanced (formerly the Client) menu and selected Rendering, and then Types. She clicked on the double bar, which "tore off" the Types menu.

Then she unchecked: Tree, SurfacePatch, Character (so she wouldn't wind up in the picture), Sky, Water, Ground, Grass, Clouds, and Particles. More than she needed, probably, but she figured rather safe than sorry.

Now Mr. Tiki was surrounded by an even black backgound. Chey positioned her camera and got a clean shot. Then she turned the selections back on and closed the Types menu and lowered Mr. Tiki back into position.

In GIMP, it was an easy matter to replace the black with alpha, making a clean image of Mr. Tiki.

So, to summarize, you can put a prim in the air, turn off air, water, trees, particles, avatars, and anything else you need, and get a nice clean photo!

Thursday, March 27, 2008

Put Animated GIFs on Your Land [Level IV]


Our new sim, Whimsy (Yes! We have a sim of our own! Dreamland was not big enough for us!), is under construction, and Xubi thought we should have a sign to alert visitors and a hard hat to protect their noggins. So Chey made a Whimsy Hard Hat (free at the empty point), and made an animated sign.


Chey vaguely remembered reading something about bringing animated GIFs into the world, so she did a Google search and found this web site: http://www.peregrinesalon.com/anim/. It converts GIFs into textures that you can import into the world, and gives you the code for a script for animation. Easy to use. See the Whimsy sign and grab a hard hat at the entry point.
-----
Photo: Chey find the hard hat useful when parachuting.

Sunday, March 9, 2008

Choose Where You Rez on Startup [Level 1]

Open preferences (CTRL-P) or the bottom selection in the Edit menu at the top of the screen.

In Preferences, be sure the General tab at the left is selected.

Now make sure Show Start Location on Login Screen is checked.

Now from the dropdown menu just above, you can choose to rez. You can select your home or your last location. Or you can type in the name of a region (simulator) and you will rez there. Svarga, for instance, or Tol Eressea.

You can set your home to land you own, or to group land if you are in a group with land holdings. Otherwise you're limited to certain welcome areas.

Now, if you're homeless, you have the power to rez somewhere other than that griefer-infested infohub.

Don't IdleYour Life Away [Level 2]

Tired of going to the fridge for another Sam Adams and coming back to find your avie logged off?

You can buy anti-idlers that will keep you online overnight, but there's a permanent fix. Open the Client menu.

If you don't see a Client menu at the top of the screen, CTRL-ALT-D (PC) or CTRL-OPT-D (Mac) will toggle it on.

Open Client (some the newest viewers have replaced Client with a menu called ADVANCED).

Open the Character sub-menu.

Open the Character Tests sub-sub-menu and be sure Go Away / AFK When Idle is unchecked.

That's all there is to it?

So if it's so simple, why is this a level 2 tip?

Because we used the computer geek word toggle!

Wednesday, February 27, 2008

Suppress the Typing Animation [Level 2]

Xubi likes the typing animation, she says, becauase it lets you know when another avatar is preparing to say something in Chat.

Chey hates it because the thinks typing in the air makes her avatar look like it is putting quote marks around everything.

You can buy typing animations that replace the default typing anim with laptop animations or particle effects, and some animations suppress the typing anim; if you put the latter in your AO, you will not type, so long as the AO is on. Which it often won't be.

With our special investigative powers, we have figured out how to permanently suppress the typing animation! Woo hoo!

Go to the Client menu and select DEBUG SETTINGS (if you have no CLIENT menu at the top of your screen, CTRL-ALT D on the PC and CMD-ALT-D on the Mac).

Click on the little down arrow and scroll down to PlayTypingAnim and set it to FALSE.

Done.

No more typing animation, even after relog.

If you want to turn it back on, just reset it to True.